
前回の記事で、ローカル環境からGCPのPublic Subnetにある踏み台サーバーにリモートデスクトップ(RDP)アクセスできるところまで構築しました。
続いて、ローカル環境からProtected SubnetにあるWebサーバーにHTTP(S)アクセスできるように構築していきます。
ネットワーク構築
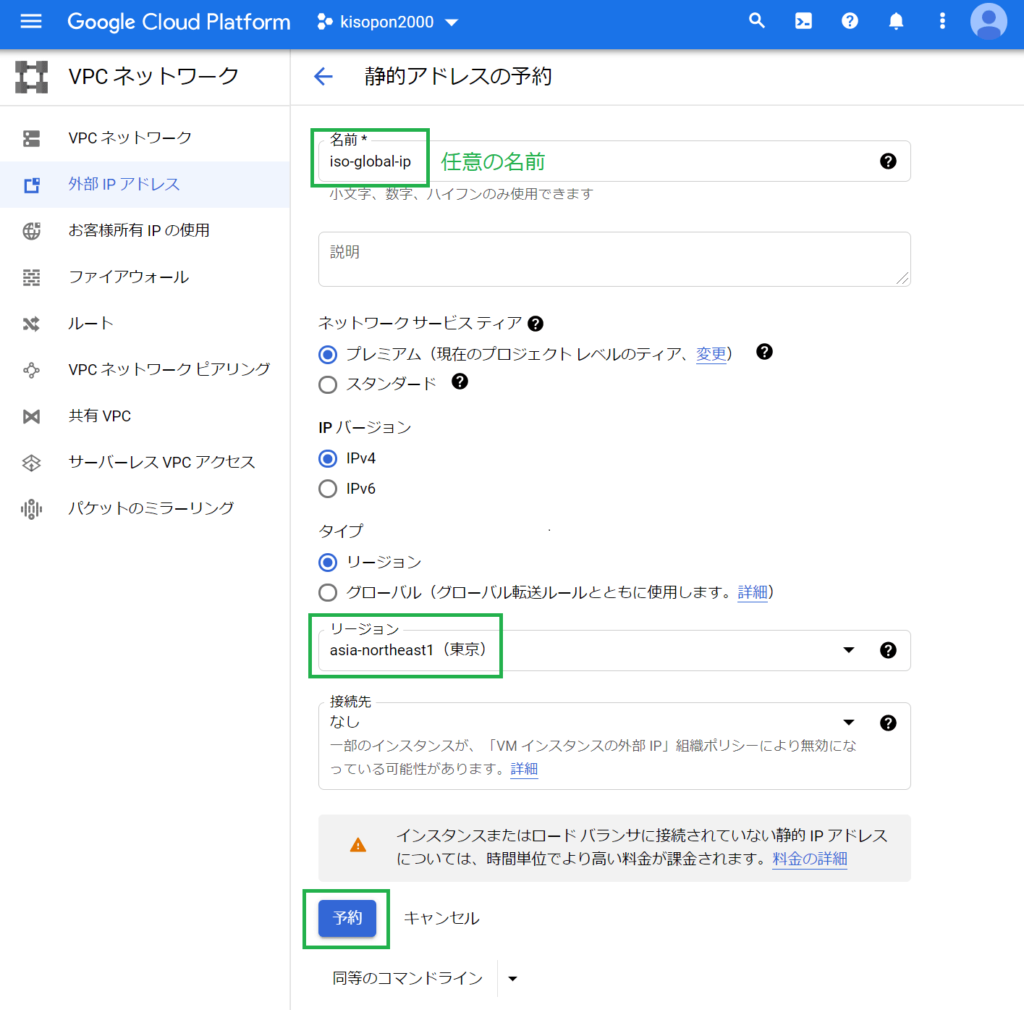
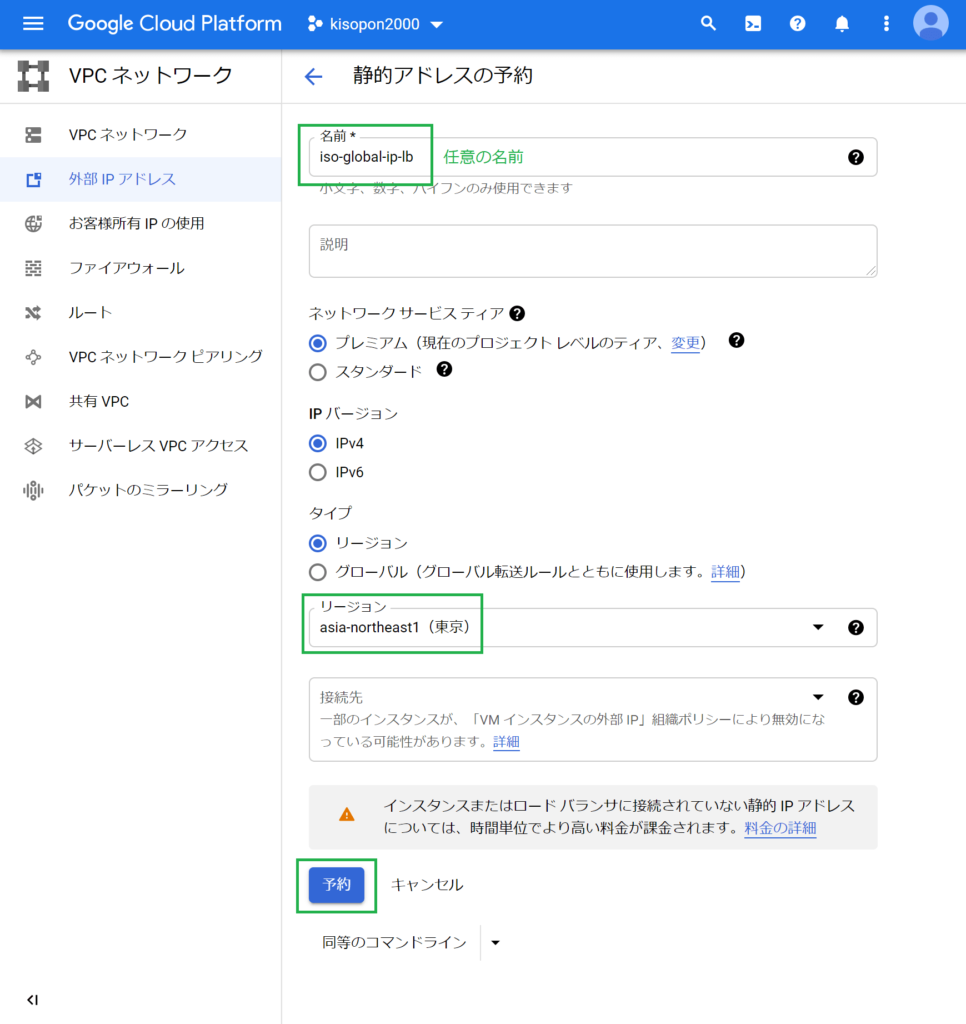
外部IPアドレスの追加
NAT用の外部IPアドレス(グローバルIPアドレス)を追加します。
Google Cloud コンソール > メニュー > ネットワーキング > VPC ネットワーク > 外部 IP アドレスで、外部IPアドレスを追加(静的アドレスを予約)します。
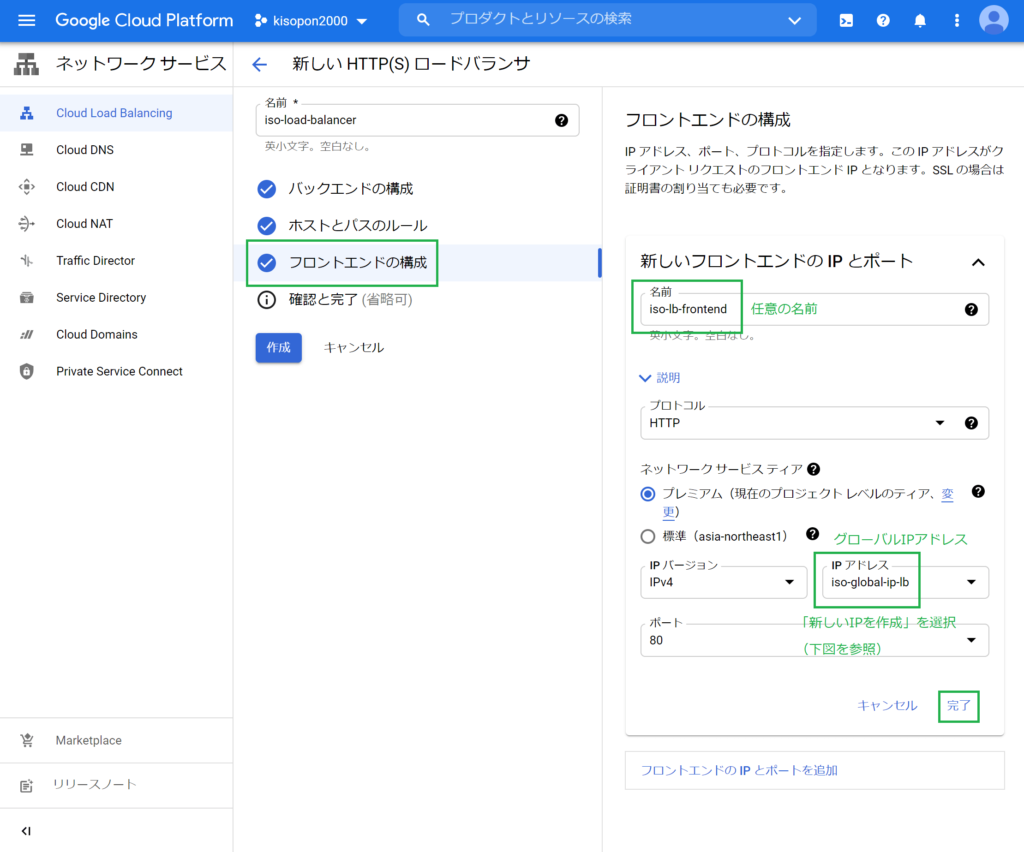
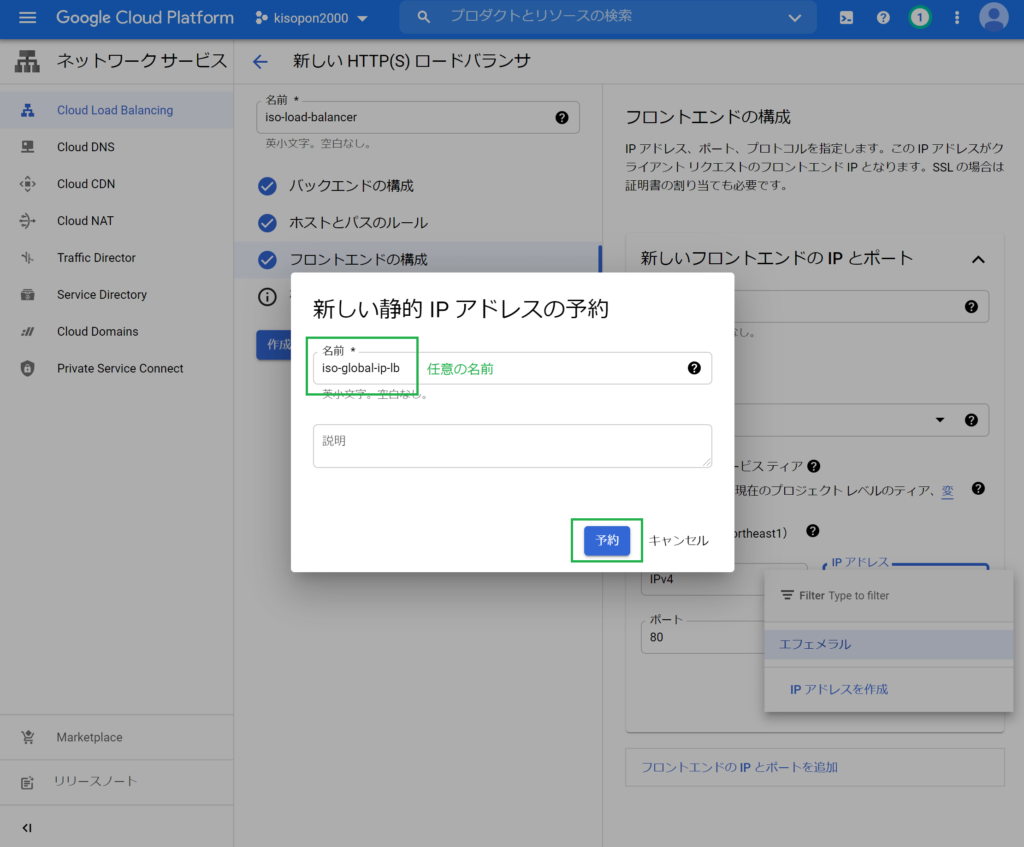
次いで、ロードバランサー用の外部IPアドレス(グローバルIPアドレス)を追加します。
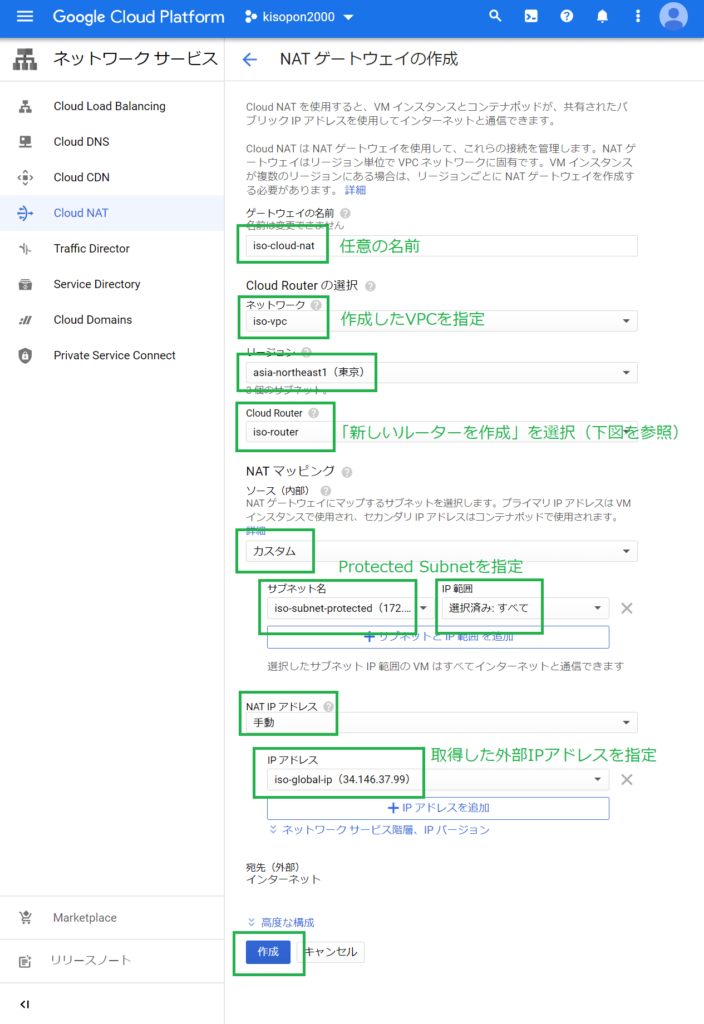
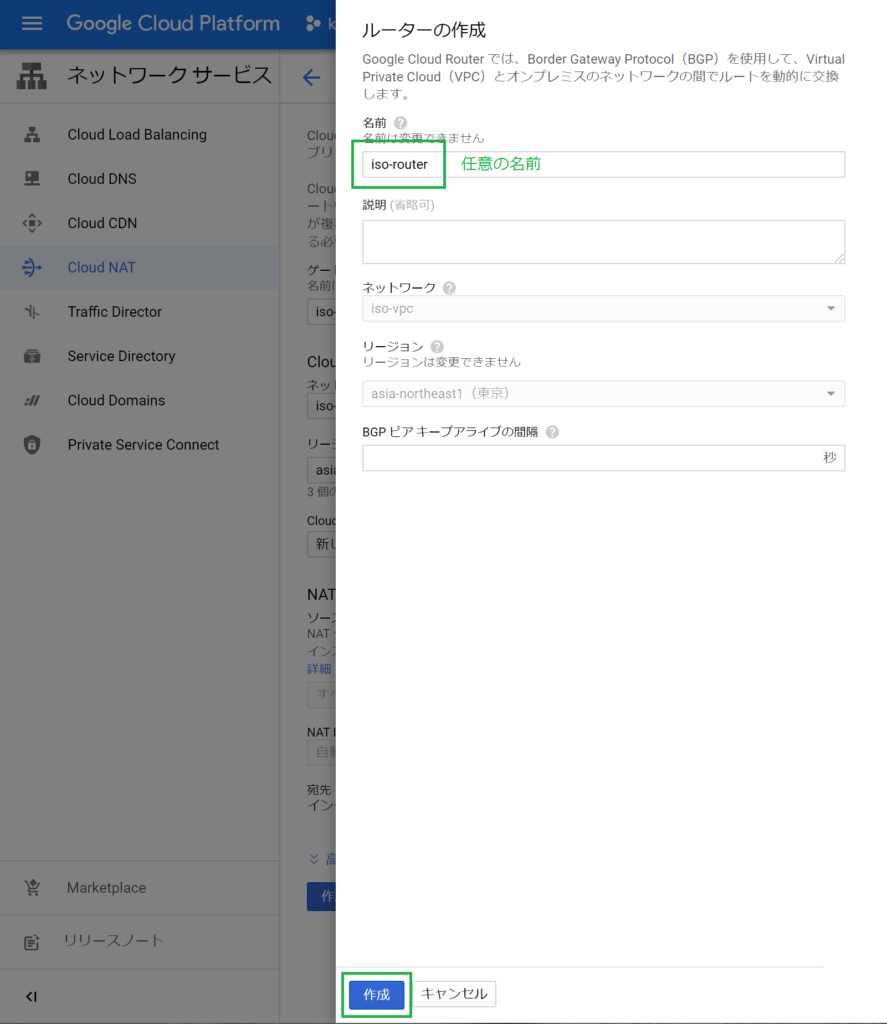
Cloud NATの追加
Cloud NATを追加します。
Google Cloud コンソール > メニュー > ネットワーキング > ネットワーク サービス > Cloud NATで、Cloud NATを作成します(開始ボタンを押下します)。
GCE(Webサーバー)の追加
GCE(Webサーバー)をProtected Subnetに追加します。
Google Cloud コンソール > メニュー > コンピューティング > Compute Engine > VM インスタンスで、VMインスタンスを作成します。
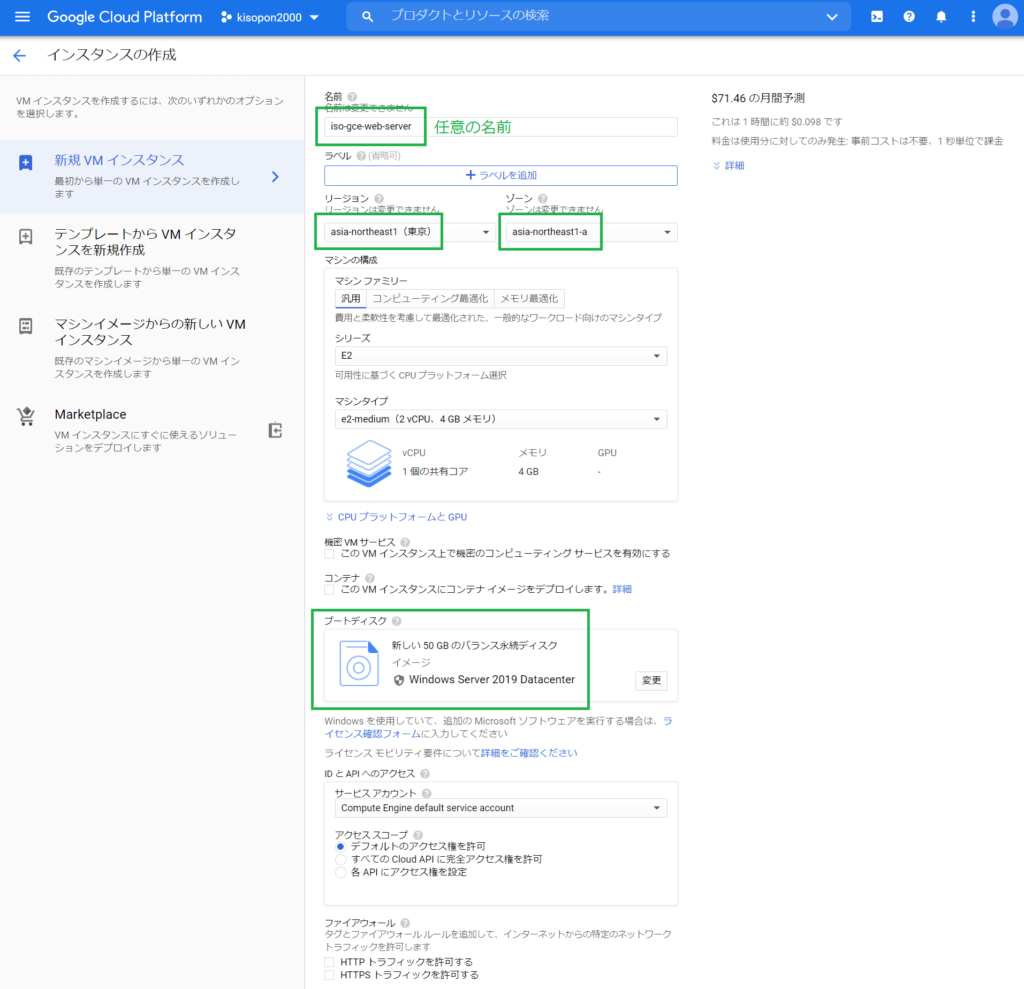
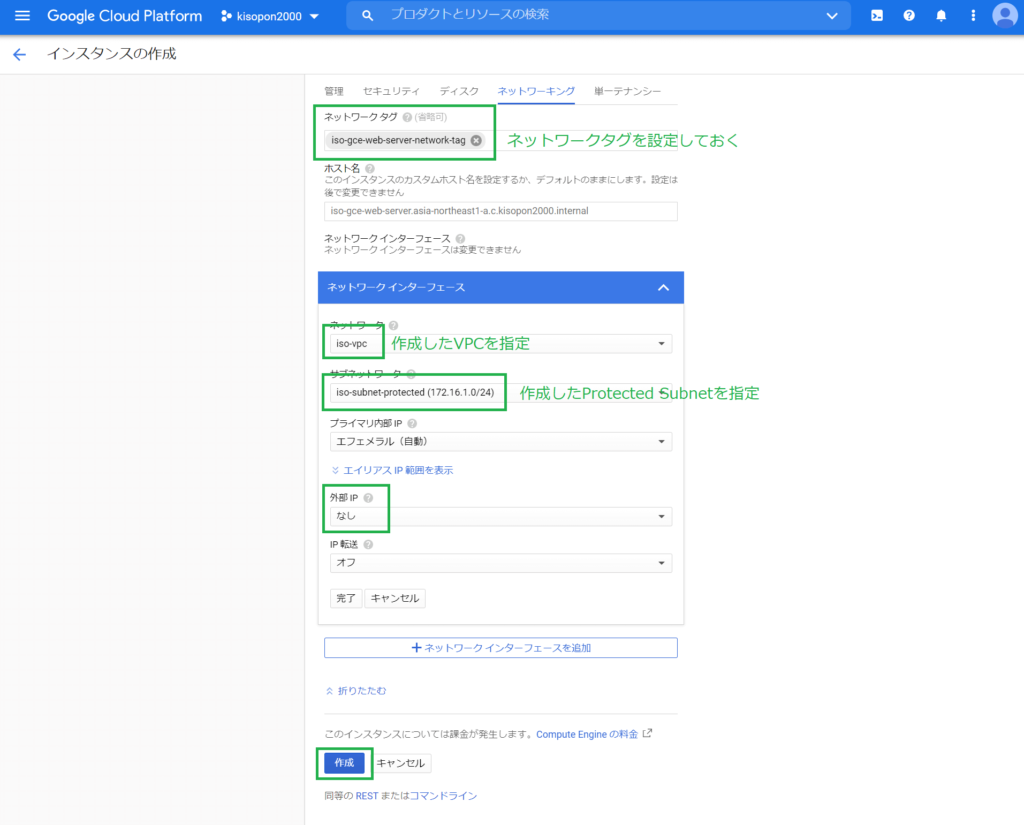
その他はデフォルト設定のまま作成をします。
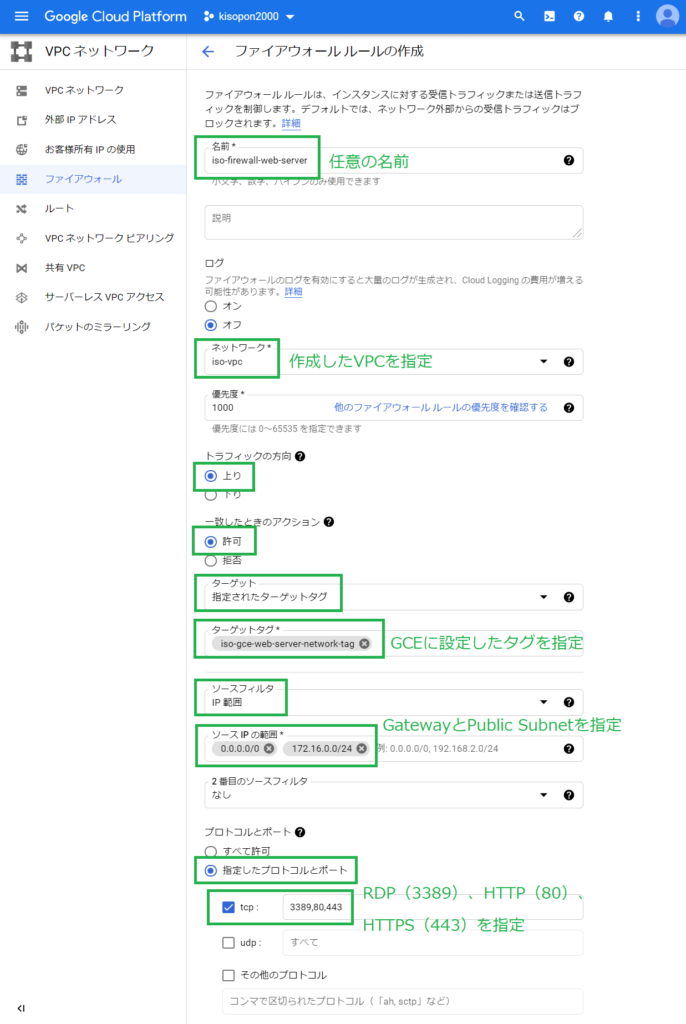
Firewallの追加
GCE(Webサーバー)に適用するFirewallを追加します。
GCE(Webサーバー)の起動
GCE(Webサーバー)を起動します。
Google Cloud コンソール > メニュー > コンピューティング > Compute Engine > VM インスタンスで、作成したインスタンスを選択します。
内部IPを把握します。
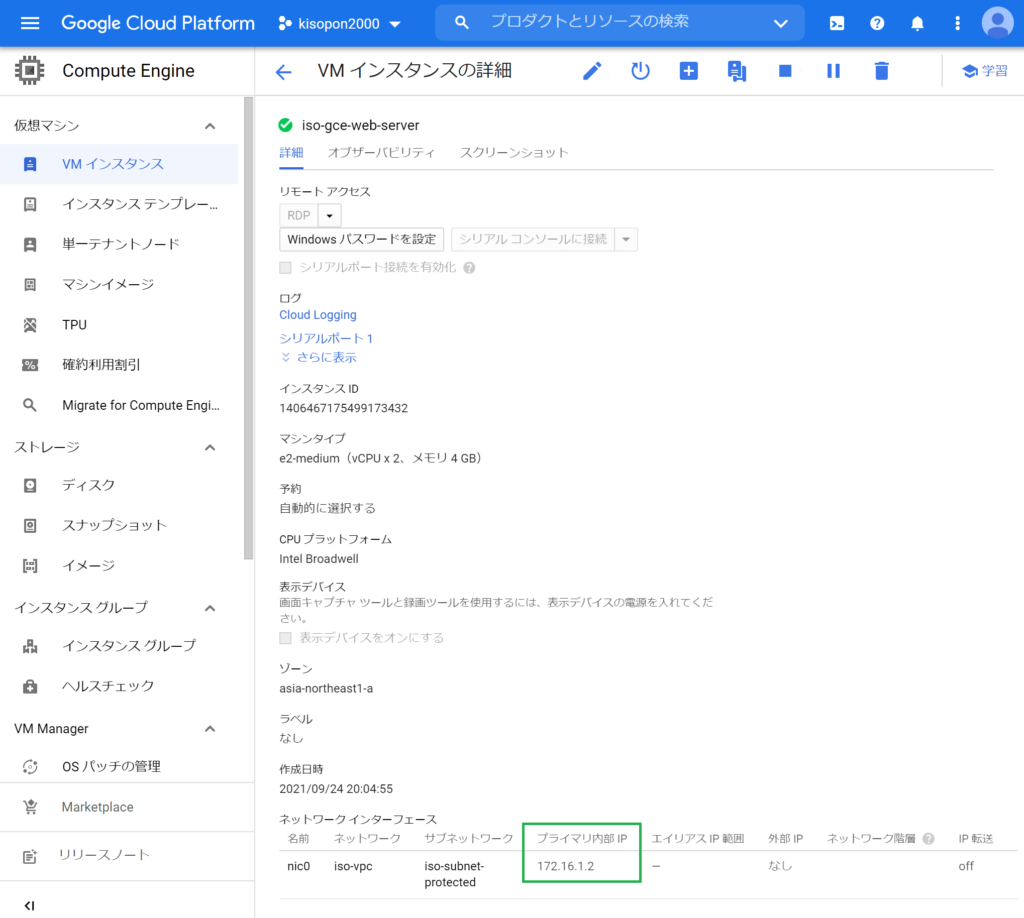
Windowsパスワードを設定(取得)します。
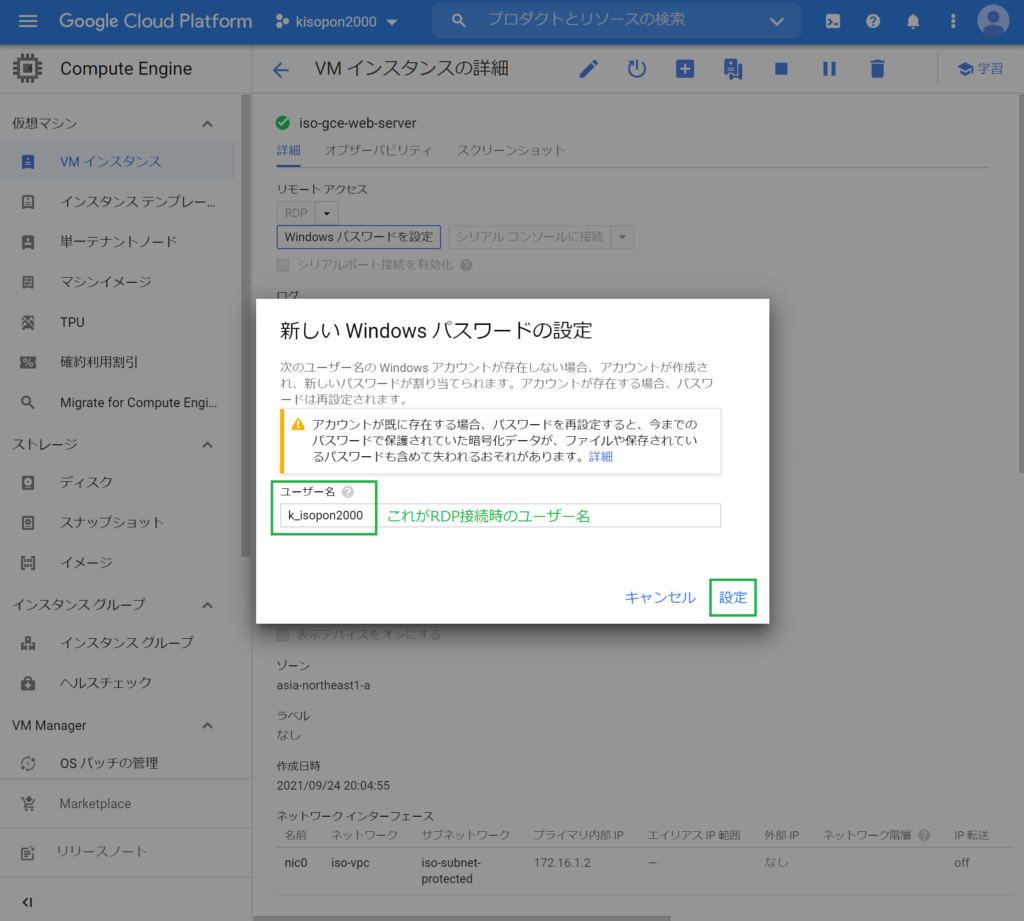
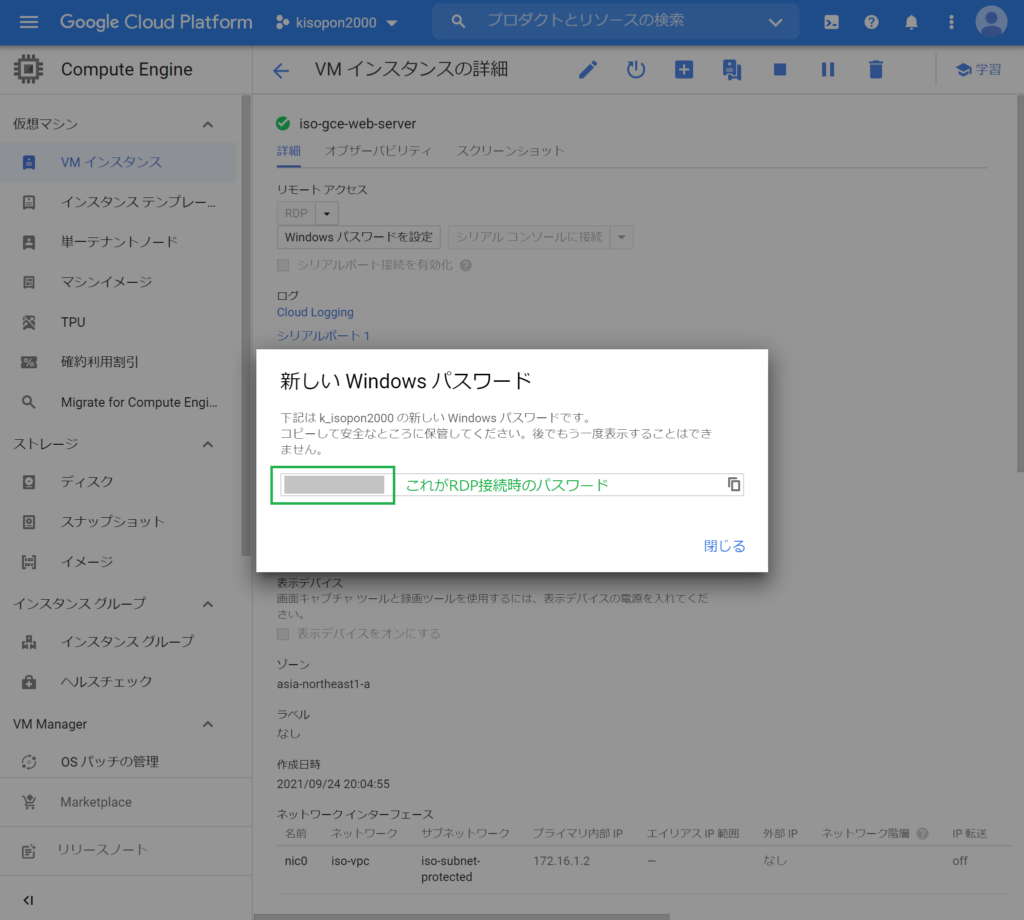
これで、Public Subnetの踏み台サーバーから「(Protected Subnetの)内部IPアドレス」とユーザー名と取得したパスワードを指定して、Protected SubnetのWebサーバーに対してリモートデスクトップ(RDP)で接続することができます。

Webサーバー構築
Webサーバー環境のセットアップ
ローカル環境 ⇒ 踏み台サーバー ⇒ WebサーバーにRDP接続します。
以下を参考に、Webサーバー環境をセットアップします。
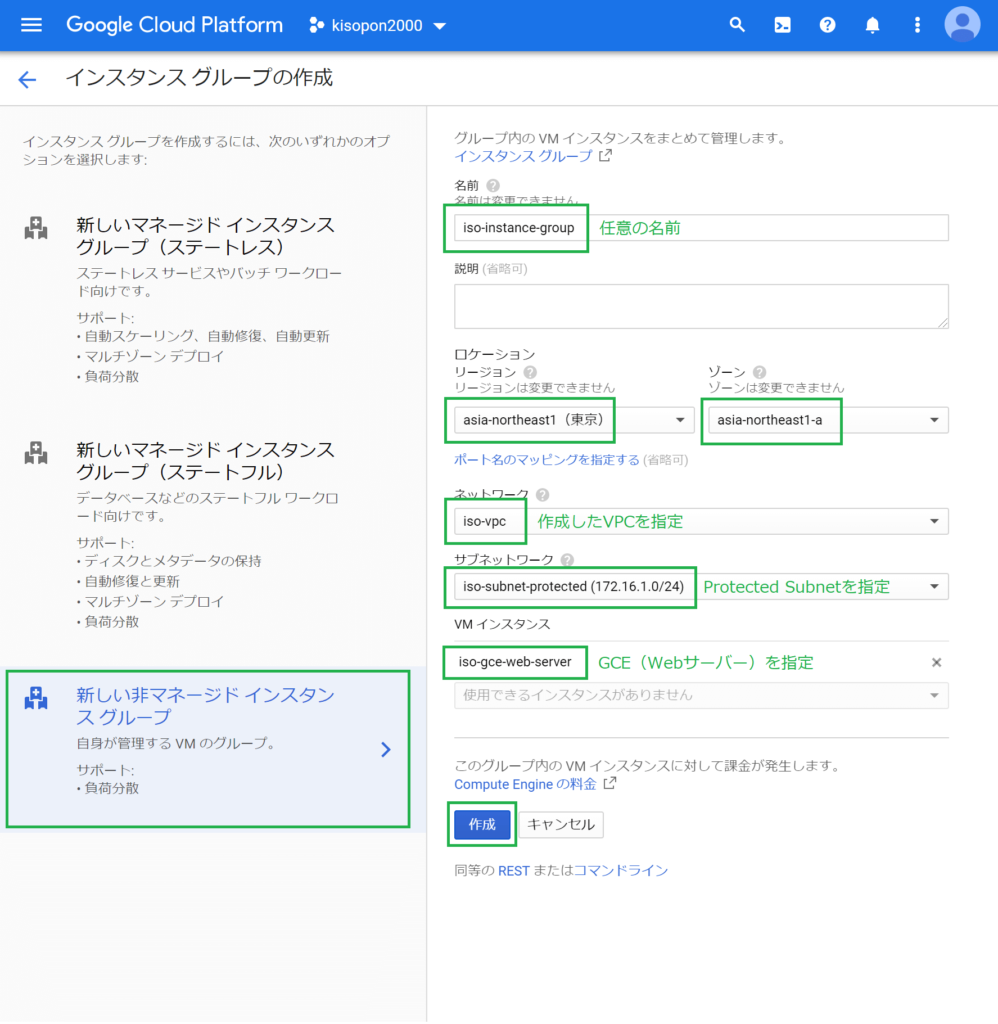
インスタンスグループの追加
GCEのインスタンスグループを追加します。ロードバランサーの追加に必要です。
Google Cloud コンソール > メニュー > コンピューティング > Compute Engine > インスタンス グループで、インスタンスグループを作成します。
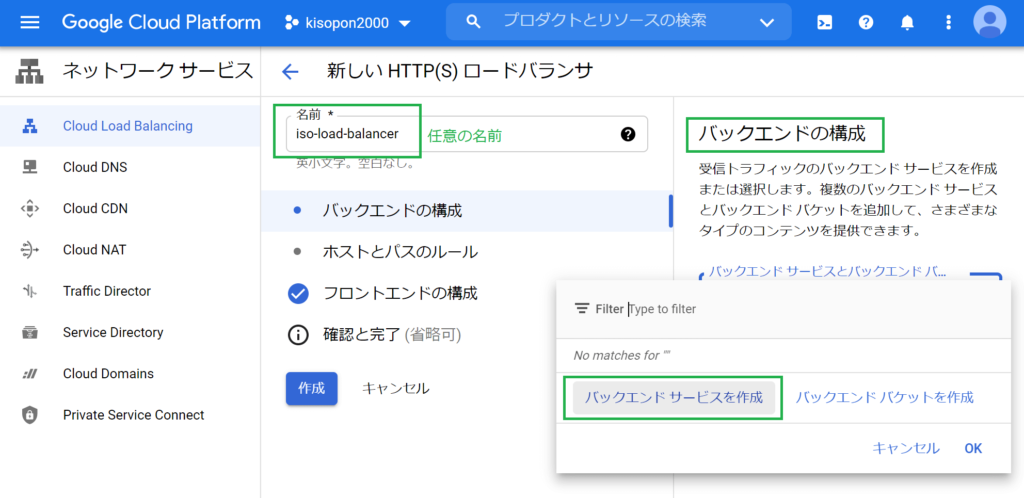
ロードバランサーの追加
ロードバランサーを追加します。
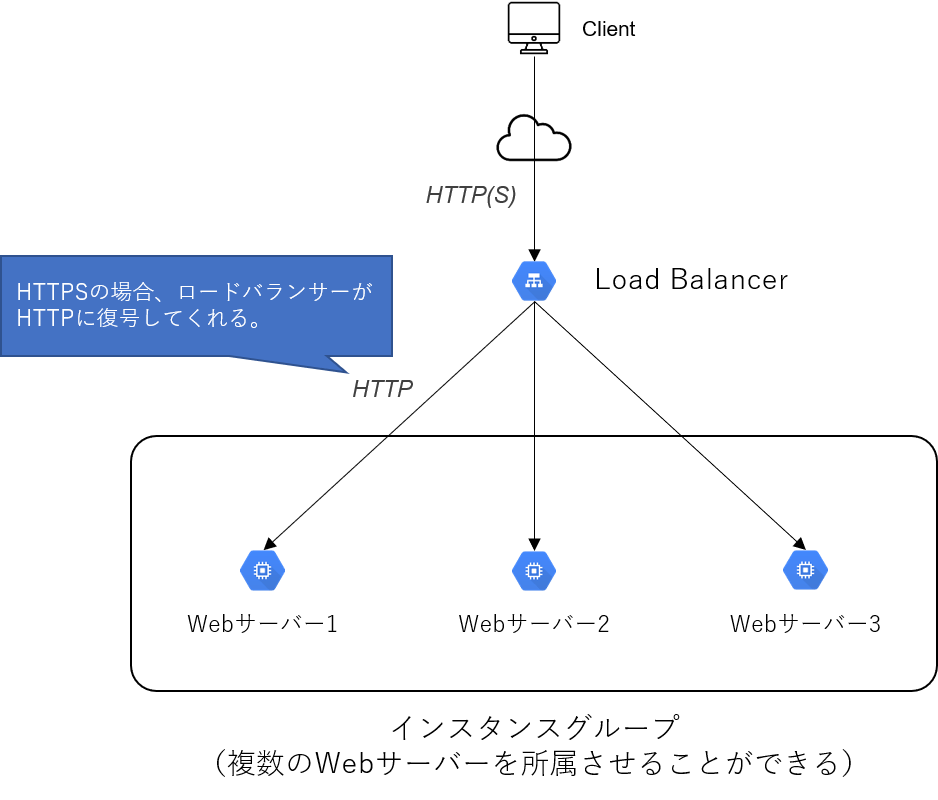
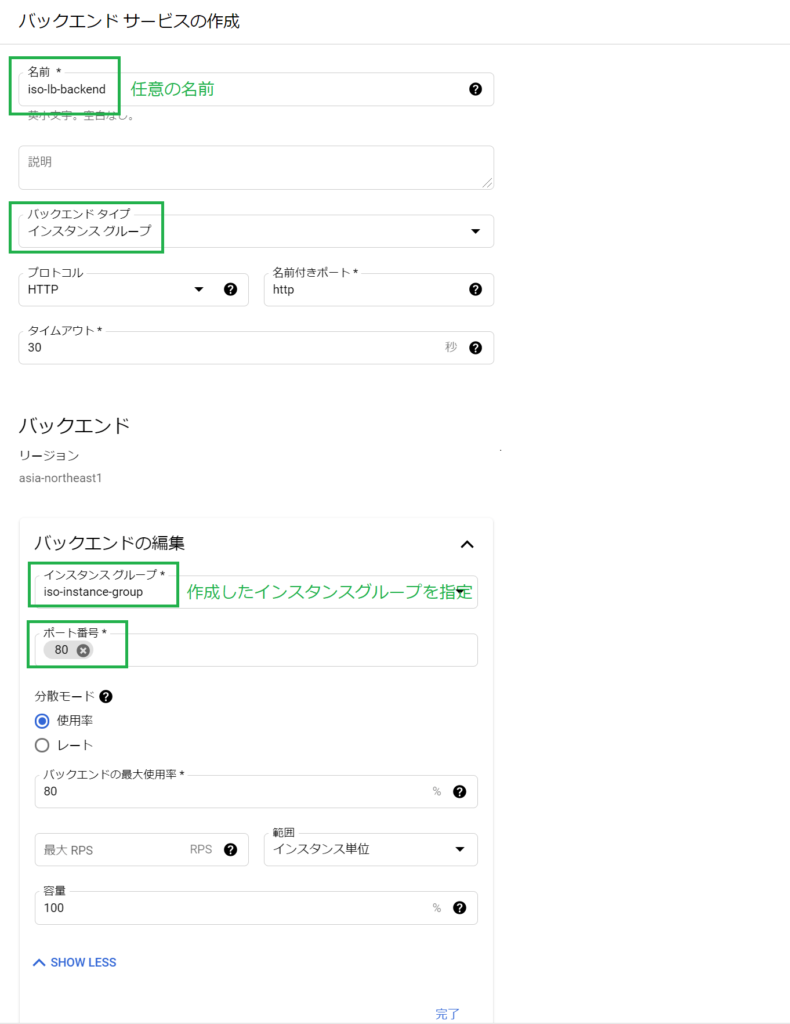
ロードバランサーは、クライアントからのHTTP(S)リクエストをWebサーバーに通します。複数のWebサーバーをターゲットグループとして登録し、負荷分散することができます。
ここでは、インスタンスグループには1つのWebサーバーを所属させます。
Google Cloud コンソール > メニュー > ネットワーキング > ネットワークサービス > Cloud Load Balancingで、ロードバランサーを作成します。
「HTTP(S) 負荷分散」を選択し、構成を開始します。
「インターネット接続または内部専用」では、「インターネットから自分の VM へ」を選択し、続行します。
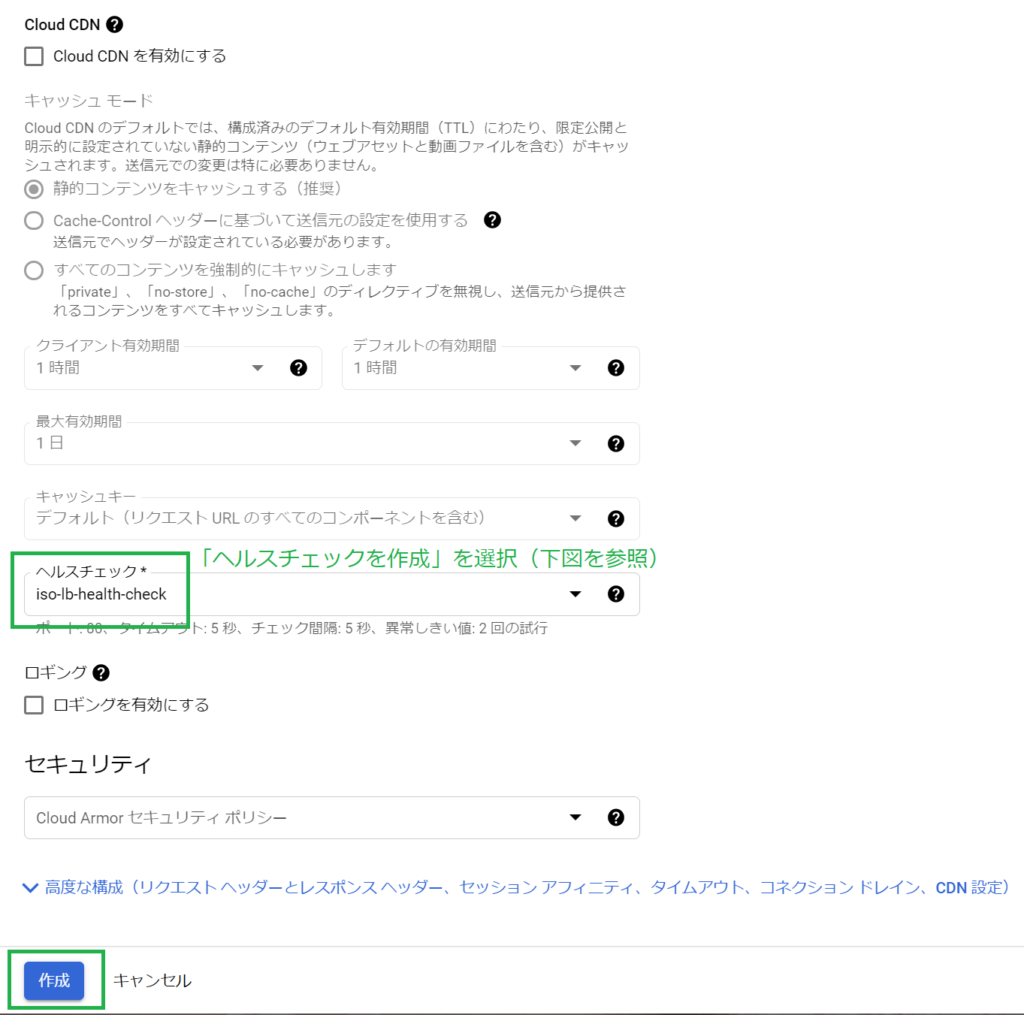
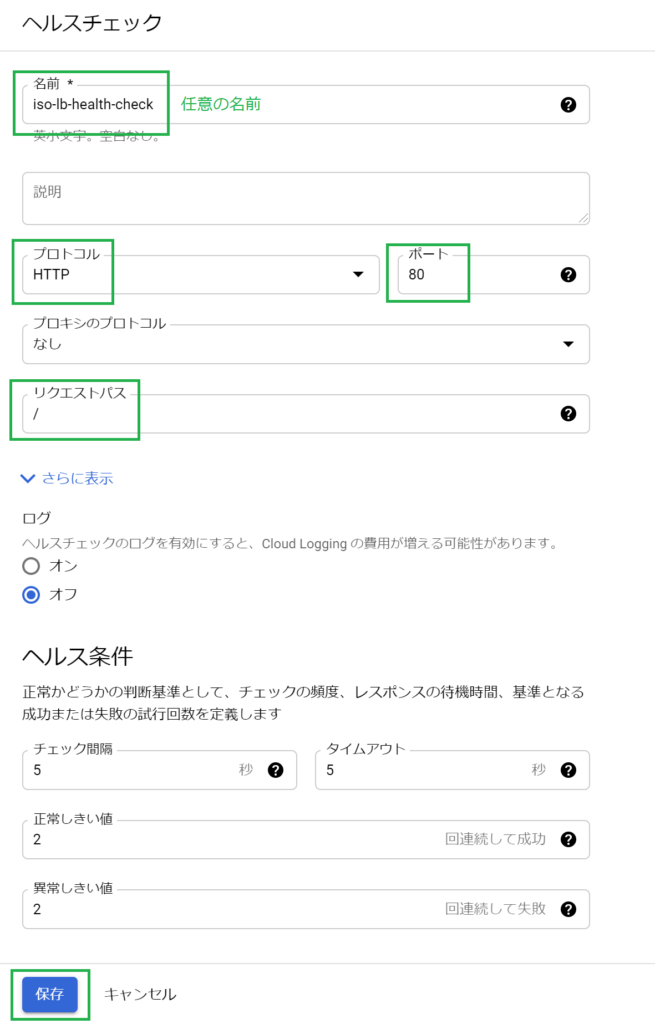
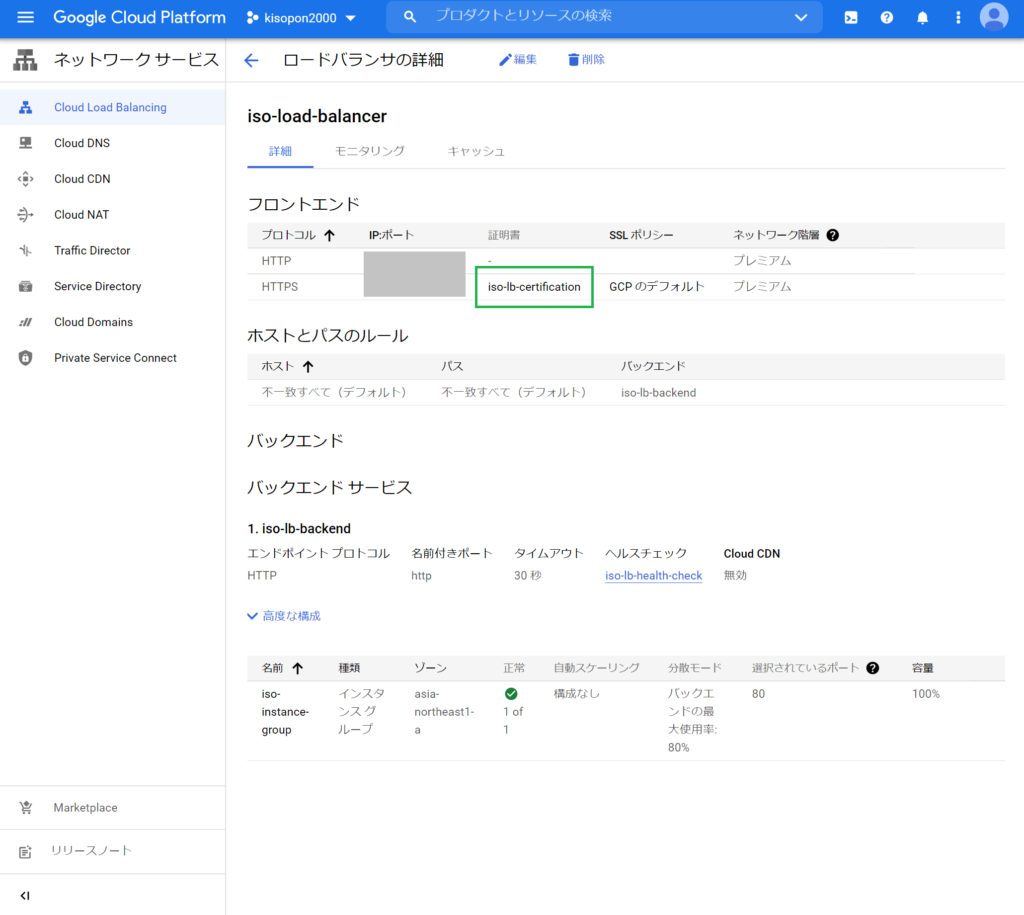
バックエンドを構成します。
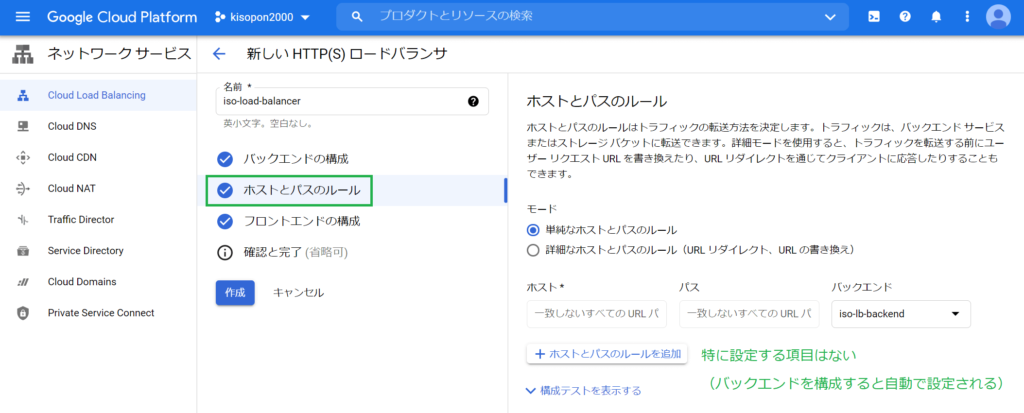
ホストとパスのルールを設定します。
フロントエンドを構成します。
作成ボタンを押して作成します。
ドメイン取得
HTTP(S)通信をするためのドメイン取得を行います。
こちらを参考に行って下さい。
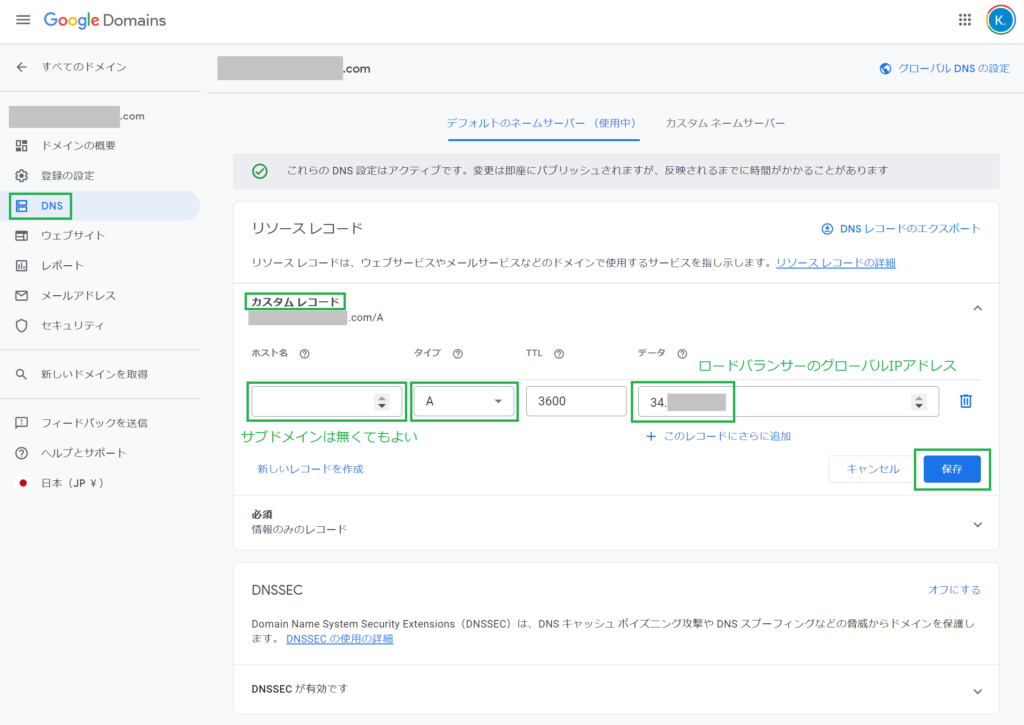
ドメインと、ロードバランサーの(のフロントエンドで設定した)グローバルIPアドレスを紐付けます。
Google Domainsにアクセスし、マイドメイン > 取得したドメインを選択 > DNSを選択します。
カスタムレコードで新しいレコードを作成します。
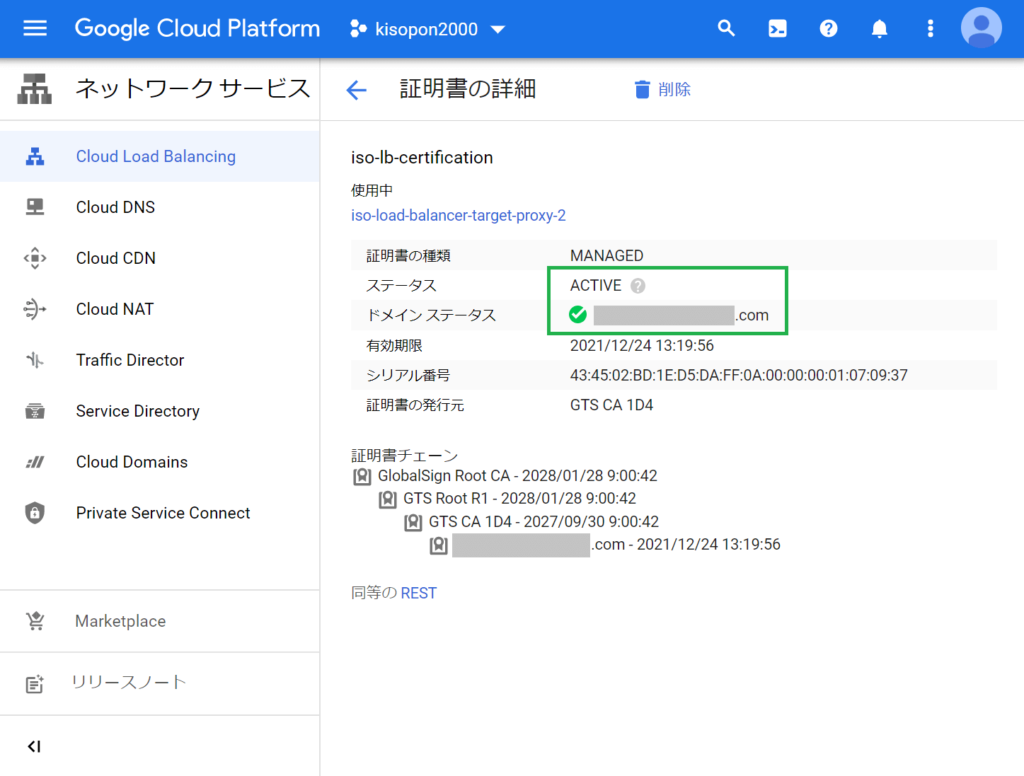
SSL証明書の発行
HTTPS通信のサーバー認証のため、SSL証明書を発行します。
Google Cloud コンソール > メニュー > ネットワーキング > ネットワークサービス > Cloud Load Balancingで、作成したロードバランサーを選択し、フロントエンドの編集を行います。
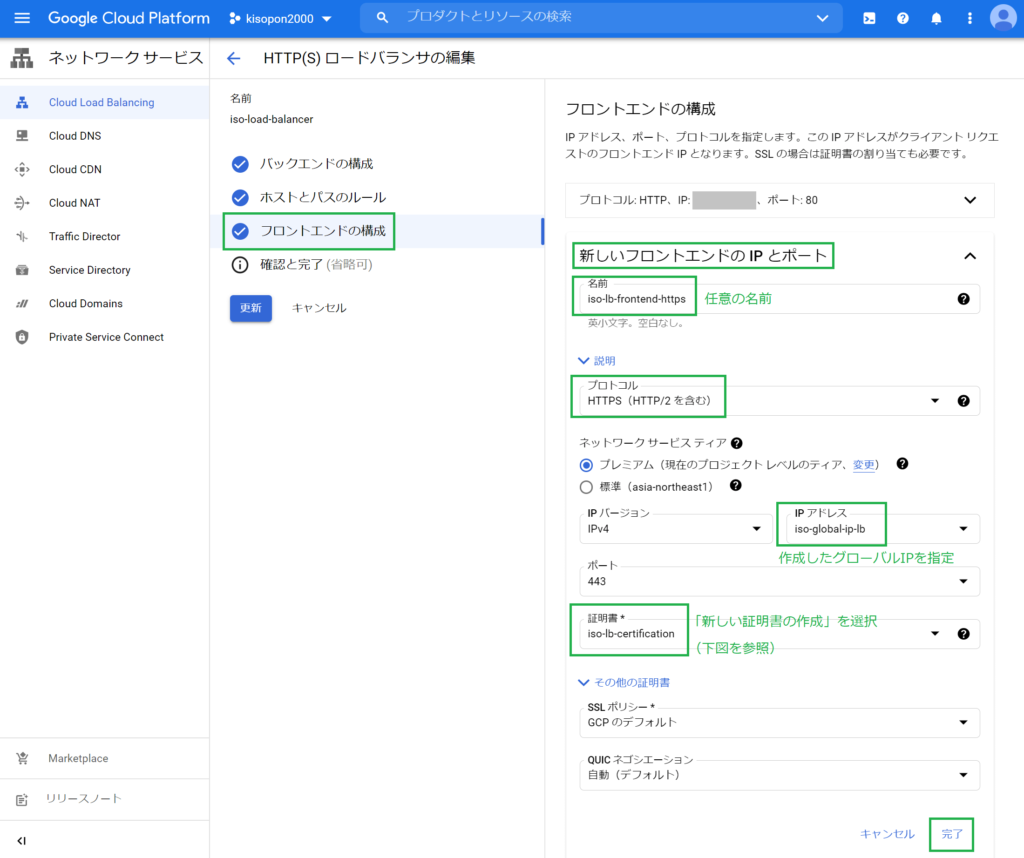
更新ボタンを押して保存します。
SSL証明書がActiveになるのを待ちます。数分かかります。
以上で、クライアント環境のブラウザで「https://<サブドメイン>.<取得したドメイン名>」(e.g. https://www.iso-domain.com) へアクセスすることができます。
続きはこちらになります。